Trunk: the rebirth


As mentioned previously, I got this old trunk off of Craigslist for $40 and it needed some work. Well, it needed more than "some". About 20 hours or so later of sanding and repairing and stripping and etc.....it was done.

The brass hardware polished up nicely with steel wool and brass polish and looks almost like new. I couldnt find replacement hinges that were the exact same size, so I repaired the ones that it came with.


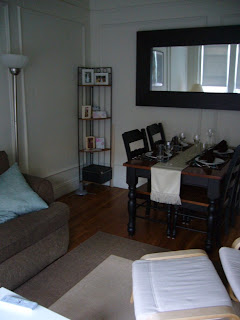
While we were originally going to use it as a coffee table, we found it worked better as a bench in our living room, inside is our collection of board games.


Again, here is the before picture:


Kitchen Light


Rachel posted earlier how our kitchen light was ugly and that we got this stainless steel one for a good price. Well, a few months ago I put it up.

This was kind of a big deal; I've never hardwired a light before. It was fairly simple, I had to do a few modifications but nothing too crazy.

We were going to buy a medallion to cover where the old light was, but instead I stole the kitty's food placemat, cut a hole in it, taped it to a piece of cardboard and put it up. Crafty! (yes we replaced the kitty's).


Total spent:
$13 for the light
$1.99 for the IKEA "medallion"

btw--I kept the old light just in case we decide to take the new one with us :)


off


on! Yeah it works!
Posted by Picasa

Our Apartment


Kitchen


Shelving that Jeremy Put Up


Living/Dining Room


Living Room


Living Room

Fun Find!


Yesterday Jeremy and I went to the Boston Building Materials Co-Op which is a non-profit that sells used building materials such as doors, cabinets, sinks and smaller things like door knobs, handles, and other hardware. We went to a similar one in Portland called The ReBuilding Center where we picked up a medicine cabinet for only $5! So we decided to check out this one just to see what they had. It was a little smaller, but we did come across a really cool metal pendant lamp. We had been talking about replacing some of the lighting in the apartment, which really isn't too bad, except for the kitchen which is circle of florescent tubing (!)

Ugly Off


Ugly On


So we thought this was a real bargain at only $13!

Compare this lamp to the one at the top which can be bought for $149!


These types of rebuilding centers are pretty cool, although they are similar to thrift stores so they require patience and sometimes you leave with nothing. But when you do find something, it is a great feeling that you got such a good deal! We will put up some more pictures when we get it up. Jeremy had a creative idea for the "medallion" that needs to go on the ceiling, so stay tuned!


BBMC (Boston)
The ReBuilding Center(Portland)
Habitat ReStores (Sacramento, Chico, etc)

Apartment Pre-Move in


Entryway from the front door


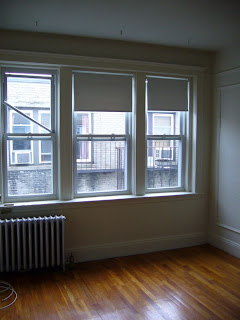
Living room view from the entryway


Livingroom


Living room with interesting trim


View from the living room

New Apartment photos


Kitchen - view from the entryway


Kitchen - with minimal counter space!


Other side of the kitchen


Kitchen Pantry


Bathroom

Trunk coffee table update


Began stripping the layers of paint off of the trunk today after work. Man, this is a bitch of a job. I wanna dunk it in a vat of Jasco, let it sit there for like 2 weeks and see whats left .

I'm just telling myself that it will look really really cool when I'm all done.

ikea ps cabinet


Picked up the IKEA PS cabinet in white this week for $31 on CL. Retail is $99. Its in perfect condition too.

Funny thing is, its more cream colored than I thought it'd be. But it looks great. Were thinking of using it as a tv cabinet.

Coffee table trunk

So, we needed a new coffee table. At first we were going to go for the Lack, but then we saw this. The storage would be really cool in our apartment, thinking about putting board games and maybe a throw inside of it.

The guy was asking $50, but I got it for $40. It needed some structural work done on it. The joints were pretty loose, it was put together with finishing nails and theyve started to back out. So I am going to screw the pieces back together.

Here are the before pictures:


MBTA subway "art"


So, I had this idea: why not put a framed picture of the Boston subway system on my wall?

I have been looking at the T map for the past few weeks as we are moving there in August. It's colorful, it represents eco-friendliness, and years of hard work and ingenuity.

I found a picture of the system that was very big via Google. Then I opened this picture in basic Paint that comes with all PC's and began cleaning up some things. The picture had some weird little imperfections that I fixed with Paint.

Next, I decided I wanted to put the picture in an Ikea frame, the FJÄLLSTA. Which is 19.75" x 19.75". How big is this in pixels? A handy calculator converts inches to pixels and vice versa.

So I need it to be 1481 x 1481 pixels. I resized the image to these dimensions. Only thing is that the picture isnt a perfect square. So resized it was 1481 x 1425. I changed the attributes within Paint to be 1481 x 1481. This left about a half inch on the top of the picture of white area. I took a sample of the picture background and then filled in that white with the greyish background color.

Next, I loaded the pic on a jumpdrive and took it to Kinkos. They charged me $23 and it was ready in about 2 hours.

It came out exactly 19.75" x 19.75". I loaded it into the Ikea frame which was $20, and voila.

I think it came out pretty good. Now we can learn the T routes simply and we have a cool piece of "art" on our walls.


I'm on Apartment Therapy

My bike rack made it onto Apartment Therapy, thats cool!

Indoor Bike Storage


Well, thought I'd share something I built a while back.

I had 4 bikes and needed an indoor storage solution and was unimpressed by the commercial indoor bike racks and astonished at their price. So I designed my own.

Although the pictures only show 2 bikes, I've had 4 up there for about a year with no issues.

Also, it takes up much less space due to the way I have the bikes hanging. I have hooks on it to hold items such as helmets, etc.

There are only two small holes (see the photo of the L bracket) going directly into the stud------good for getting your apartment's security deposit back.

Lastly, it cost about $40 to build.